Quick Start
Welcome to MonoChat! This guide will help you get started quickly, from account creation to connecting channels and running your first automated flow.
Getting Started
Step 1: Navigate to the Sign Up Page
Head to app.monochat.ai to access the Sign Up page.
If you already have an account, you can skip to the Sign In Tab and log in.
Step 2: Fill in Your Details
Enter your first name, last name, email, and create a secure password. Then click Sign Up.
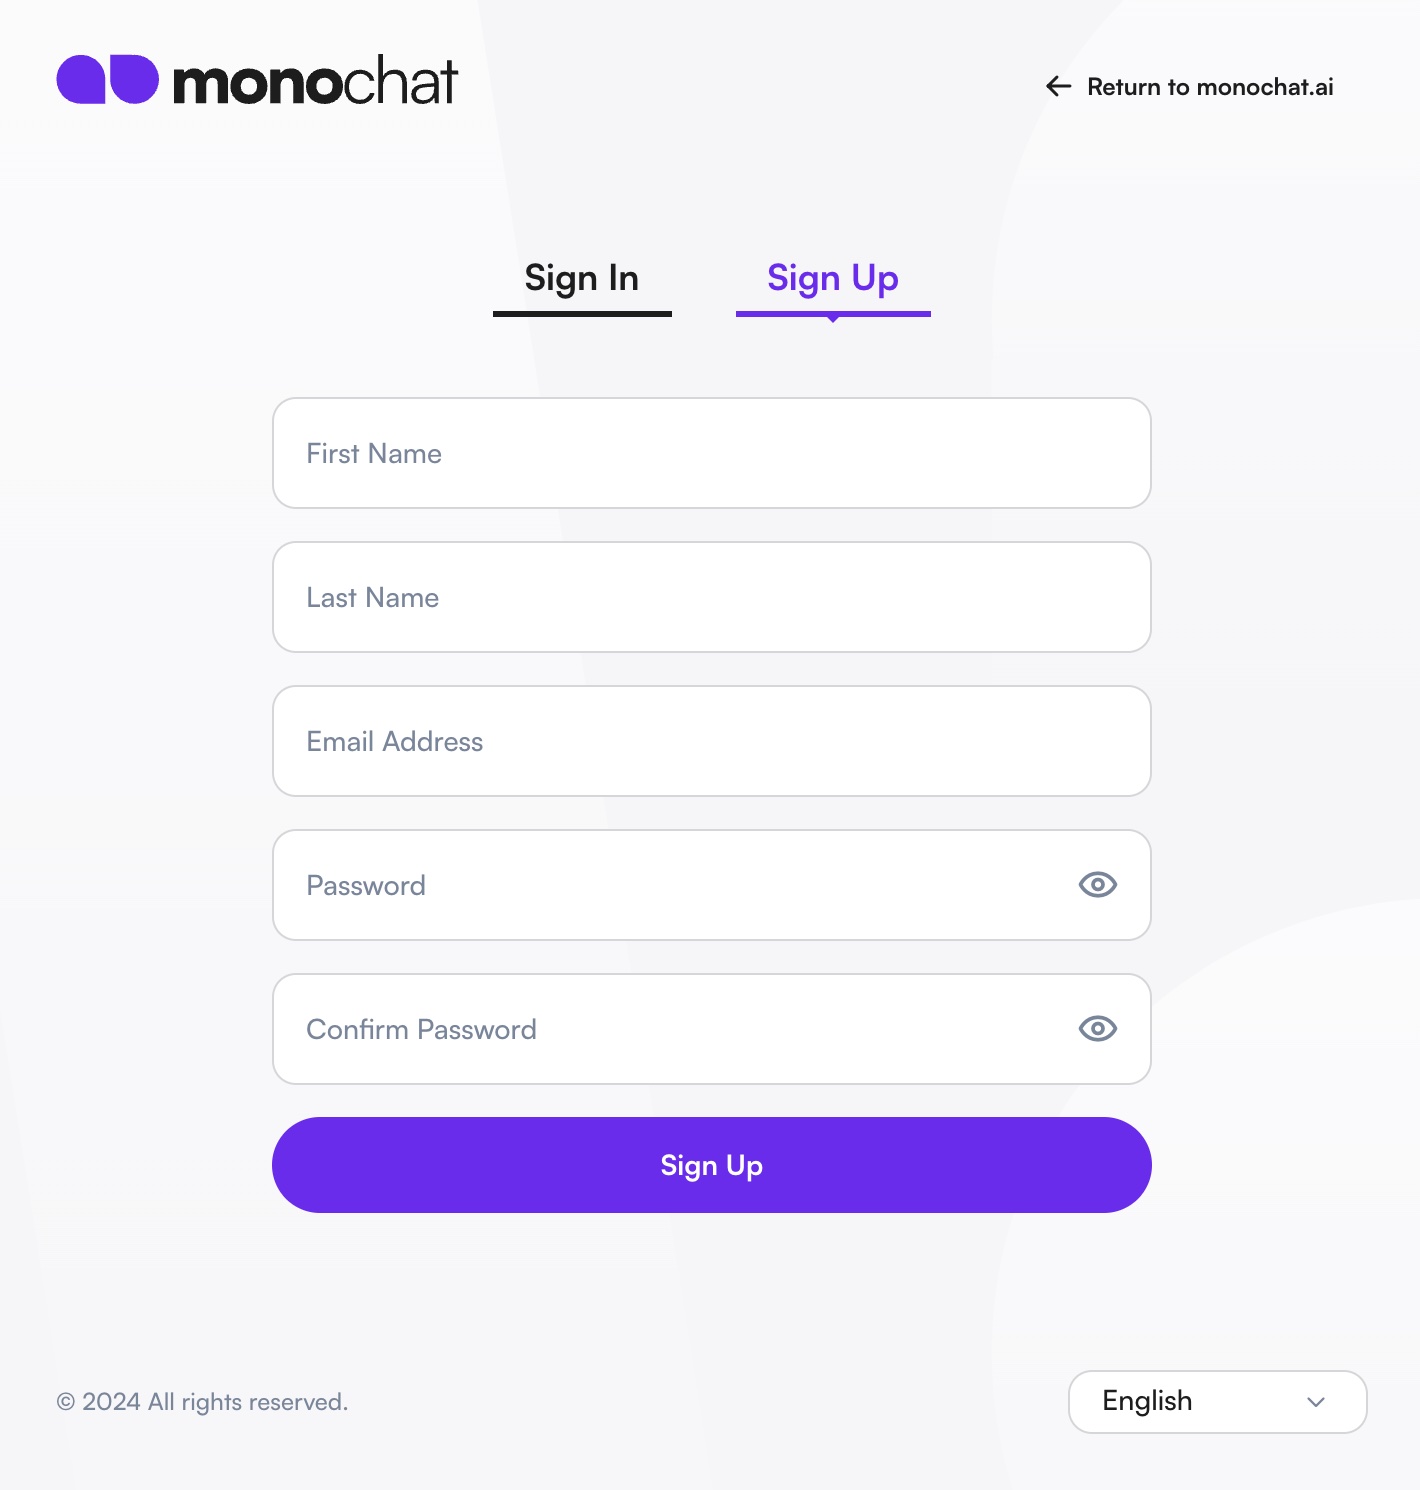
Passwords must contain at least one uppercase letter, one lowercase letter, and be at least 8 characters long.
Make sure your password is secure and memorable!
Step 3: Verify Your Email
Check your inbox for the confirmation email sent by MonoChat and click Confirm Email.
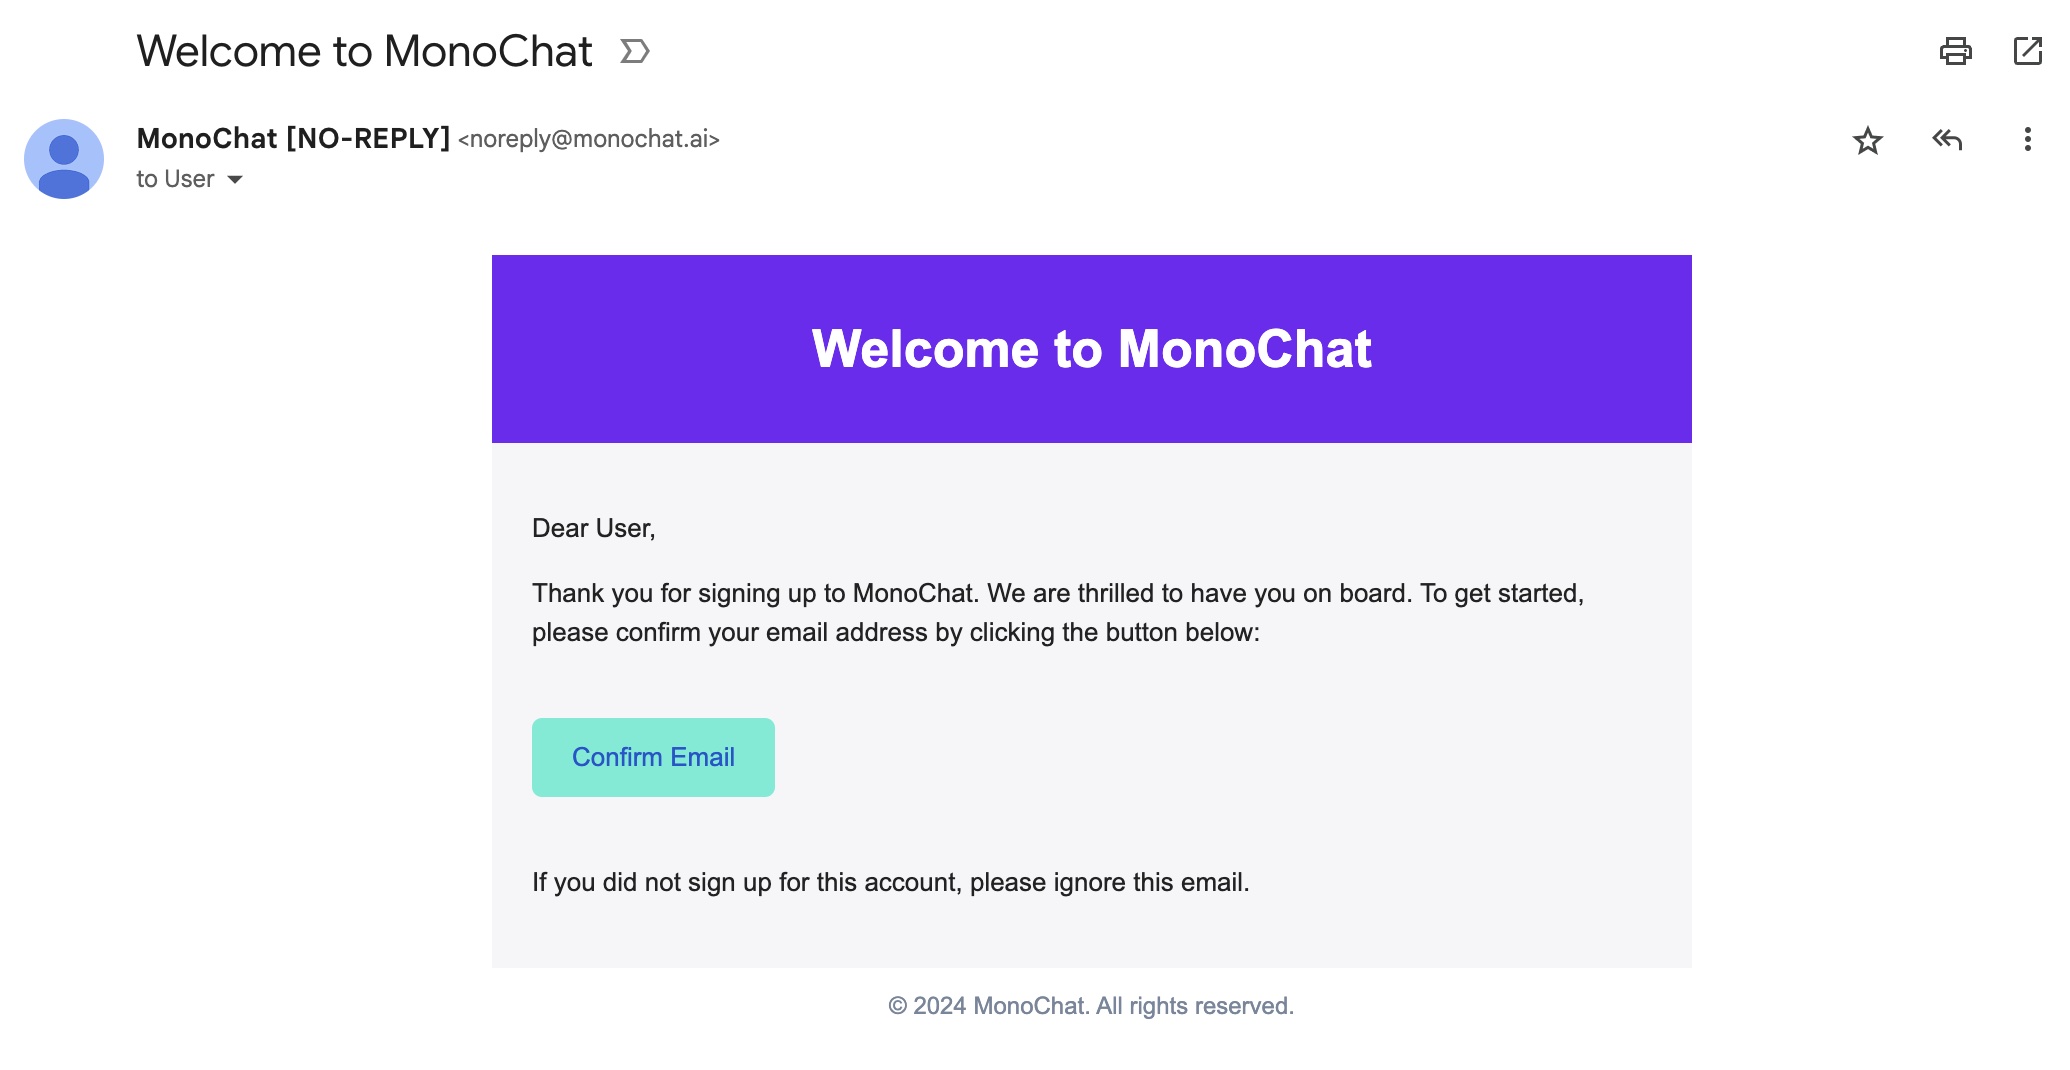
If you don’t see the email, check your spam/junk folder. You can also request a resend or contact us for assistance.
Creating Your Workspace
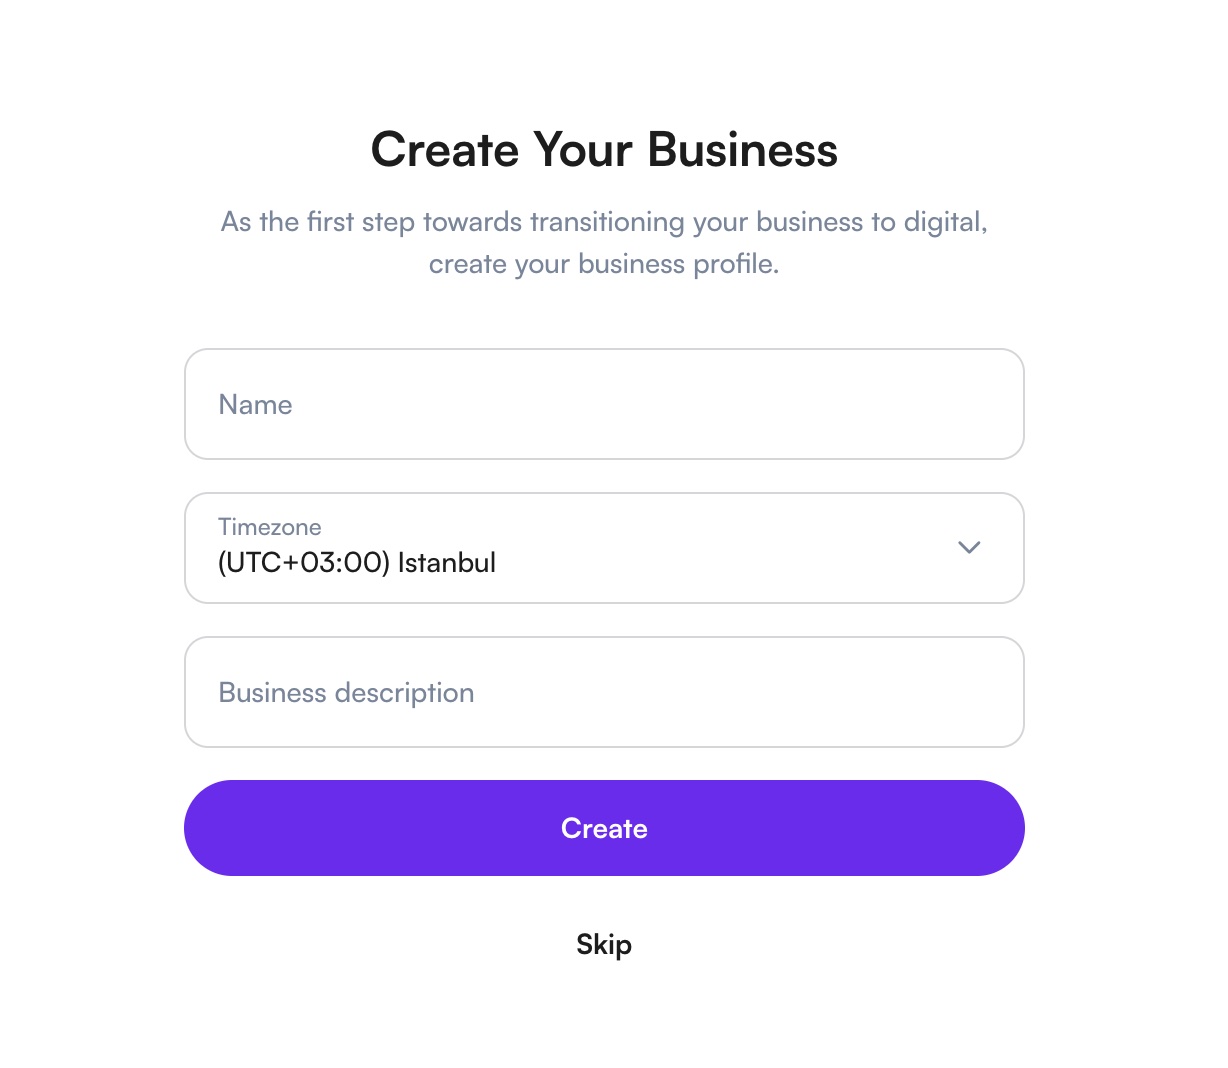
Step 4: Set Up Your Business
After confirming your email, click Continue in the MonoChat interface. Enter your business name and description, then press Create.
Step 5: Workspace Created Successfully
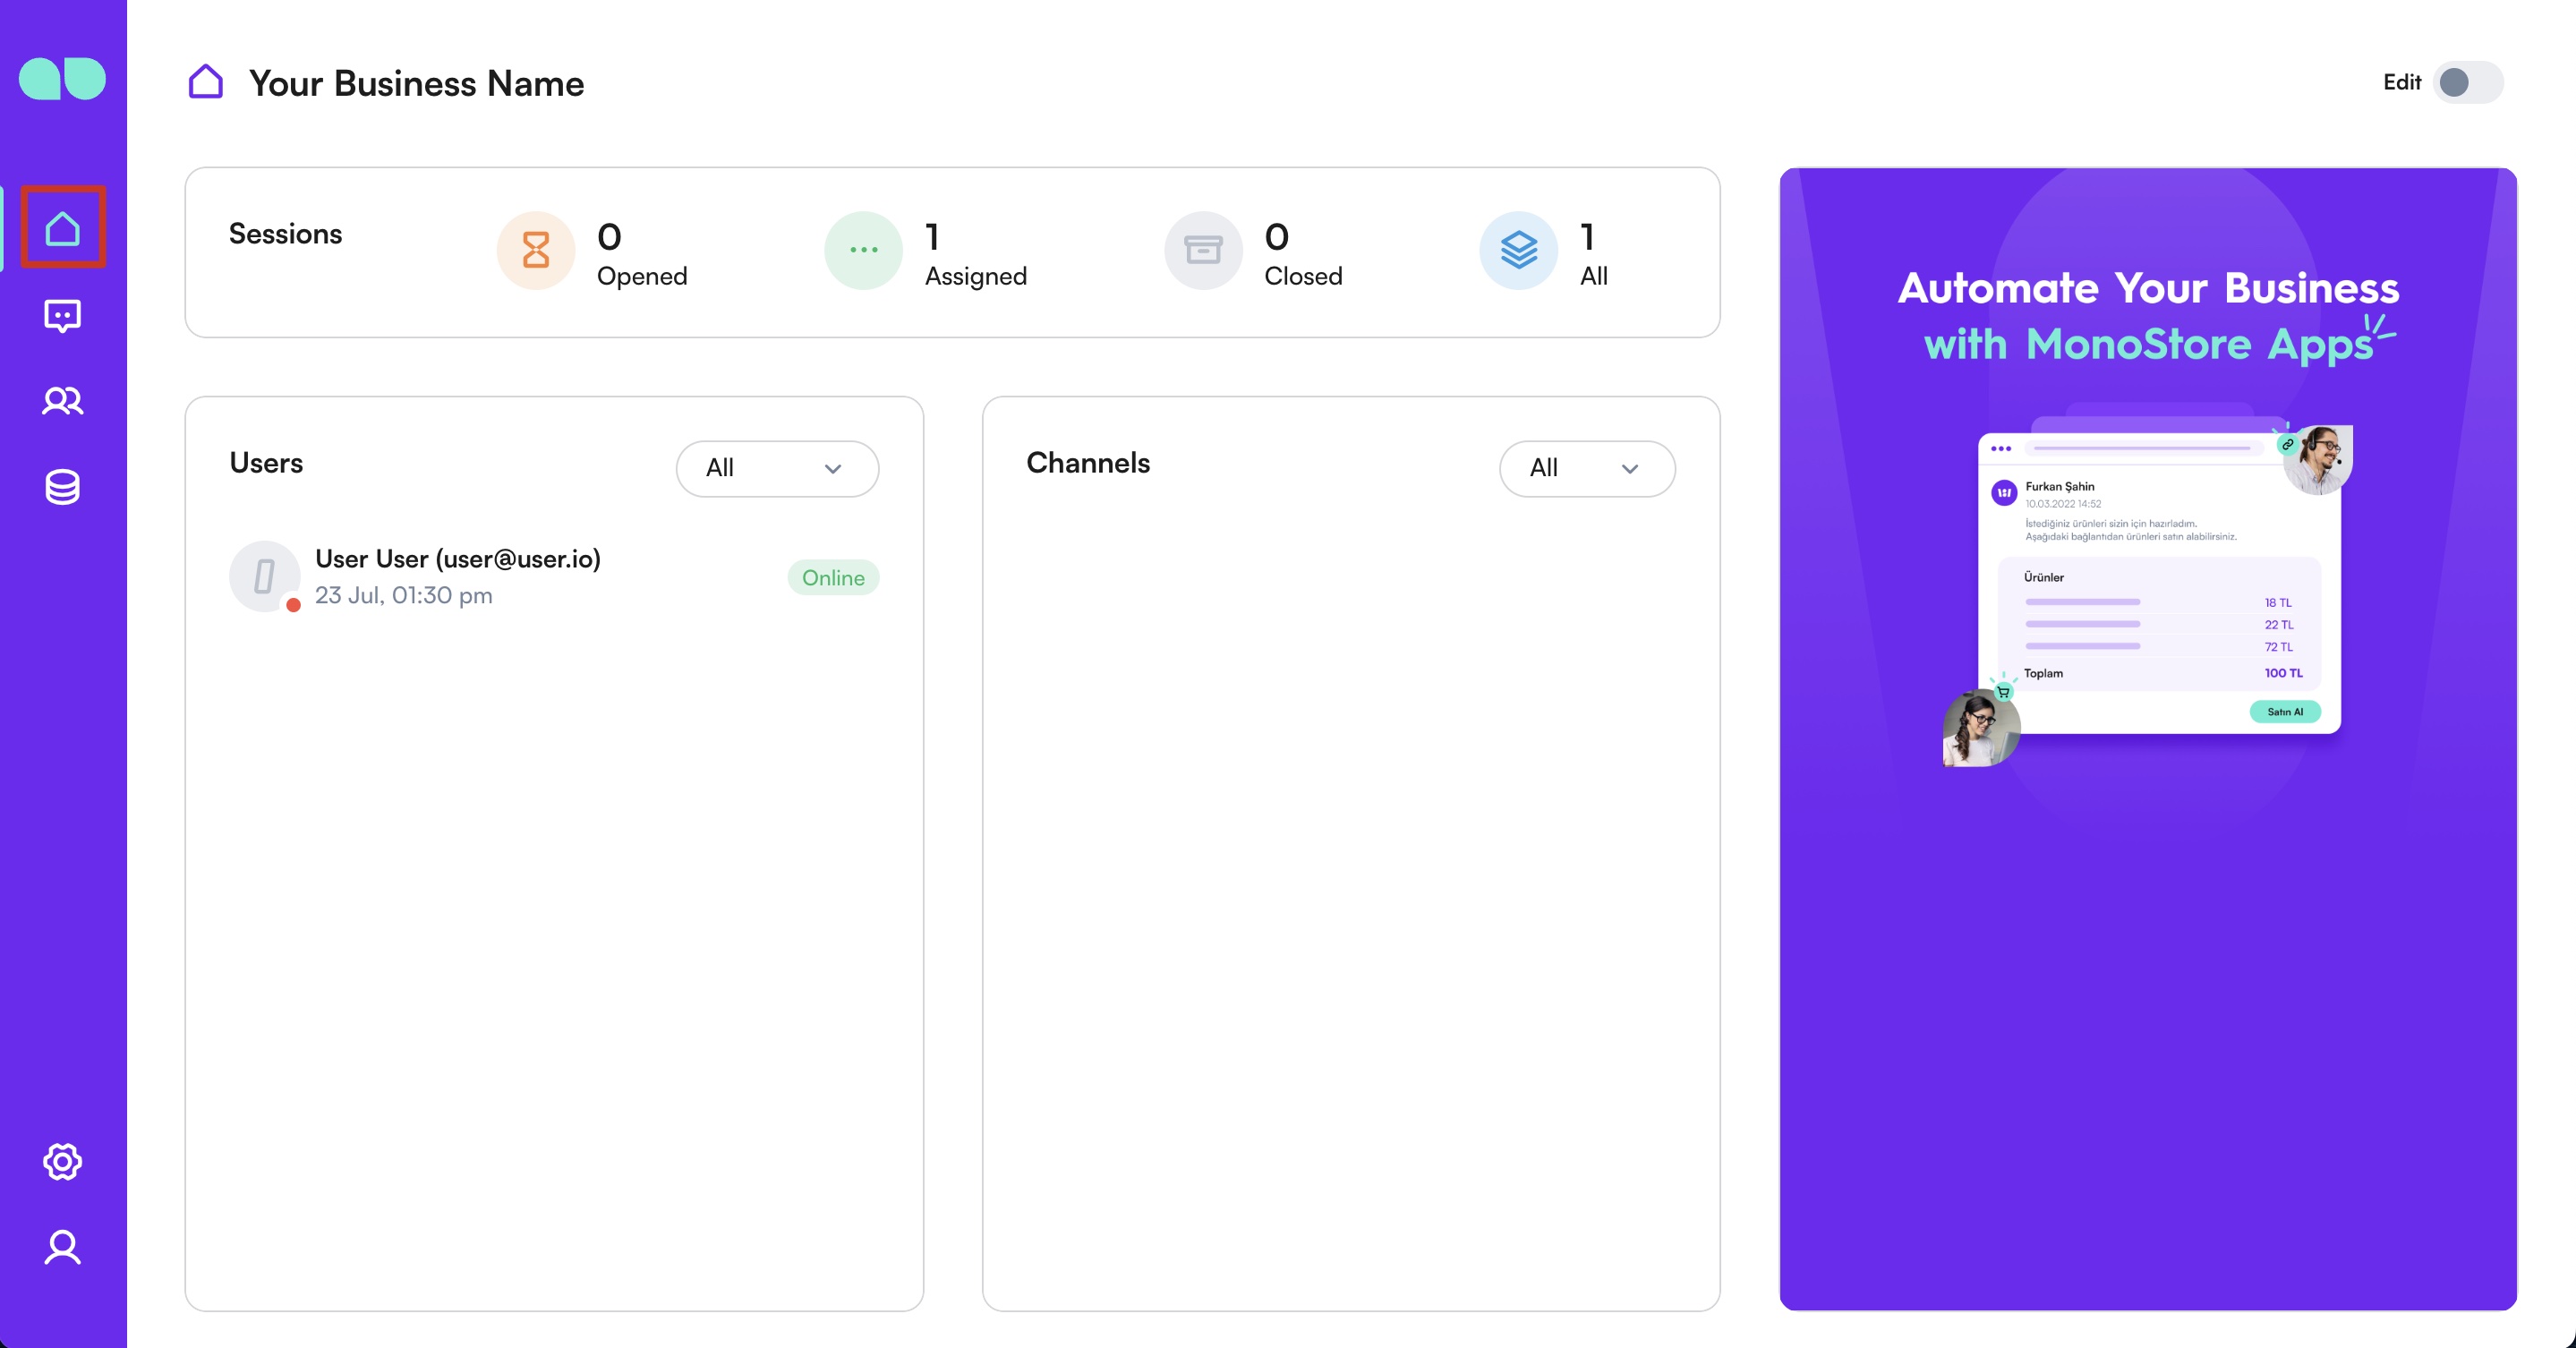
Congrats! Your workspace is ready. You can now invite team members and proceed to channel setup.
Creating Your Team
Step 6: Invite Users to Your Team
- Go to Settings > Team from the left menu.
- Navigate to the Invitations button.
- Click the
Createbutton. - Enter the email address of the user you want to invite.
- Select the role for the user (e.g., Agent, Admin, Manager).
- Send the invitation.
The invited user will receive an email. Once they accept the invitation, they will be added to your business workspace.
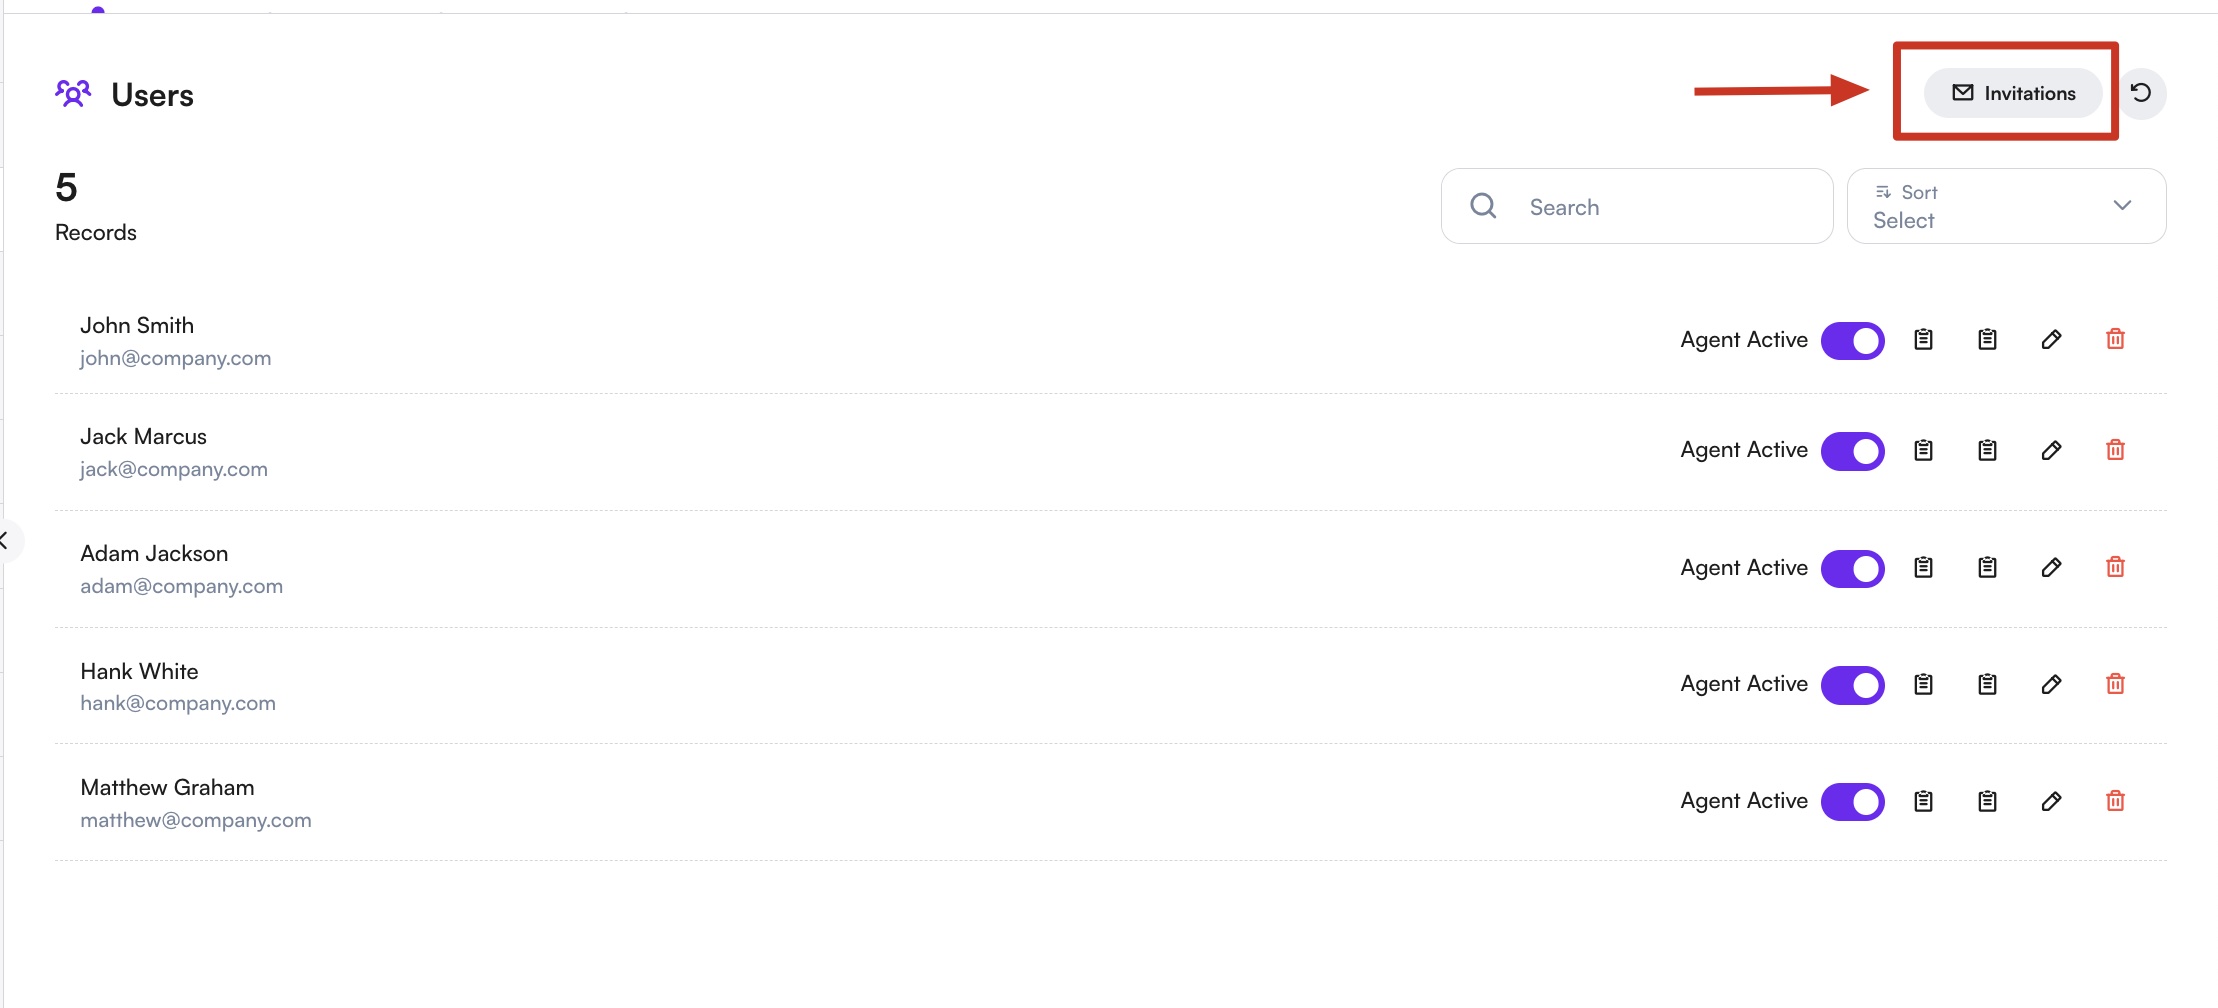
By following this process, you can build your team and manage access for multiple users in your MonoChat workspace.
Connecting Messaging Channels
Step 7: Open the Connect Channel Drawer
Go to the Chat screen from the left menu. Click the MonoChat Support conversation, then click Connect Channel on the right.
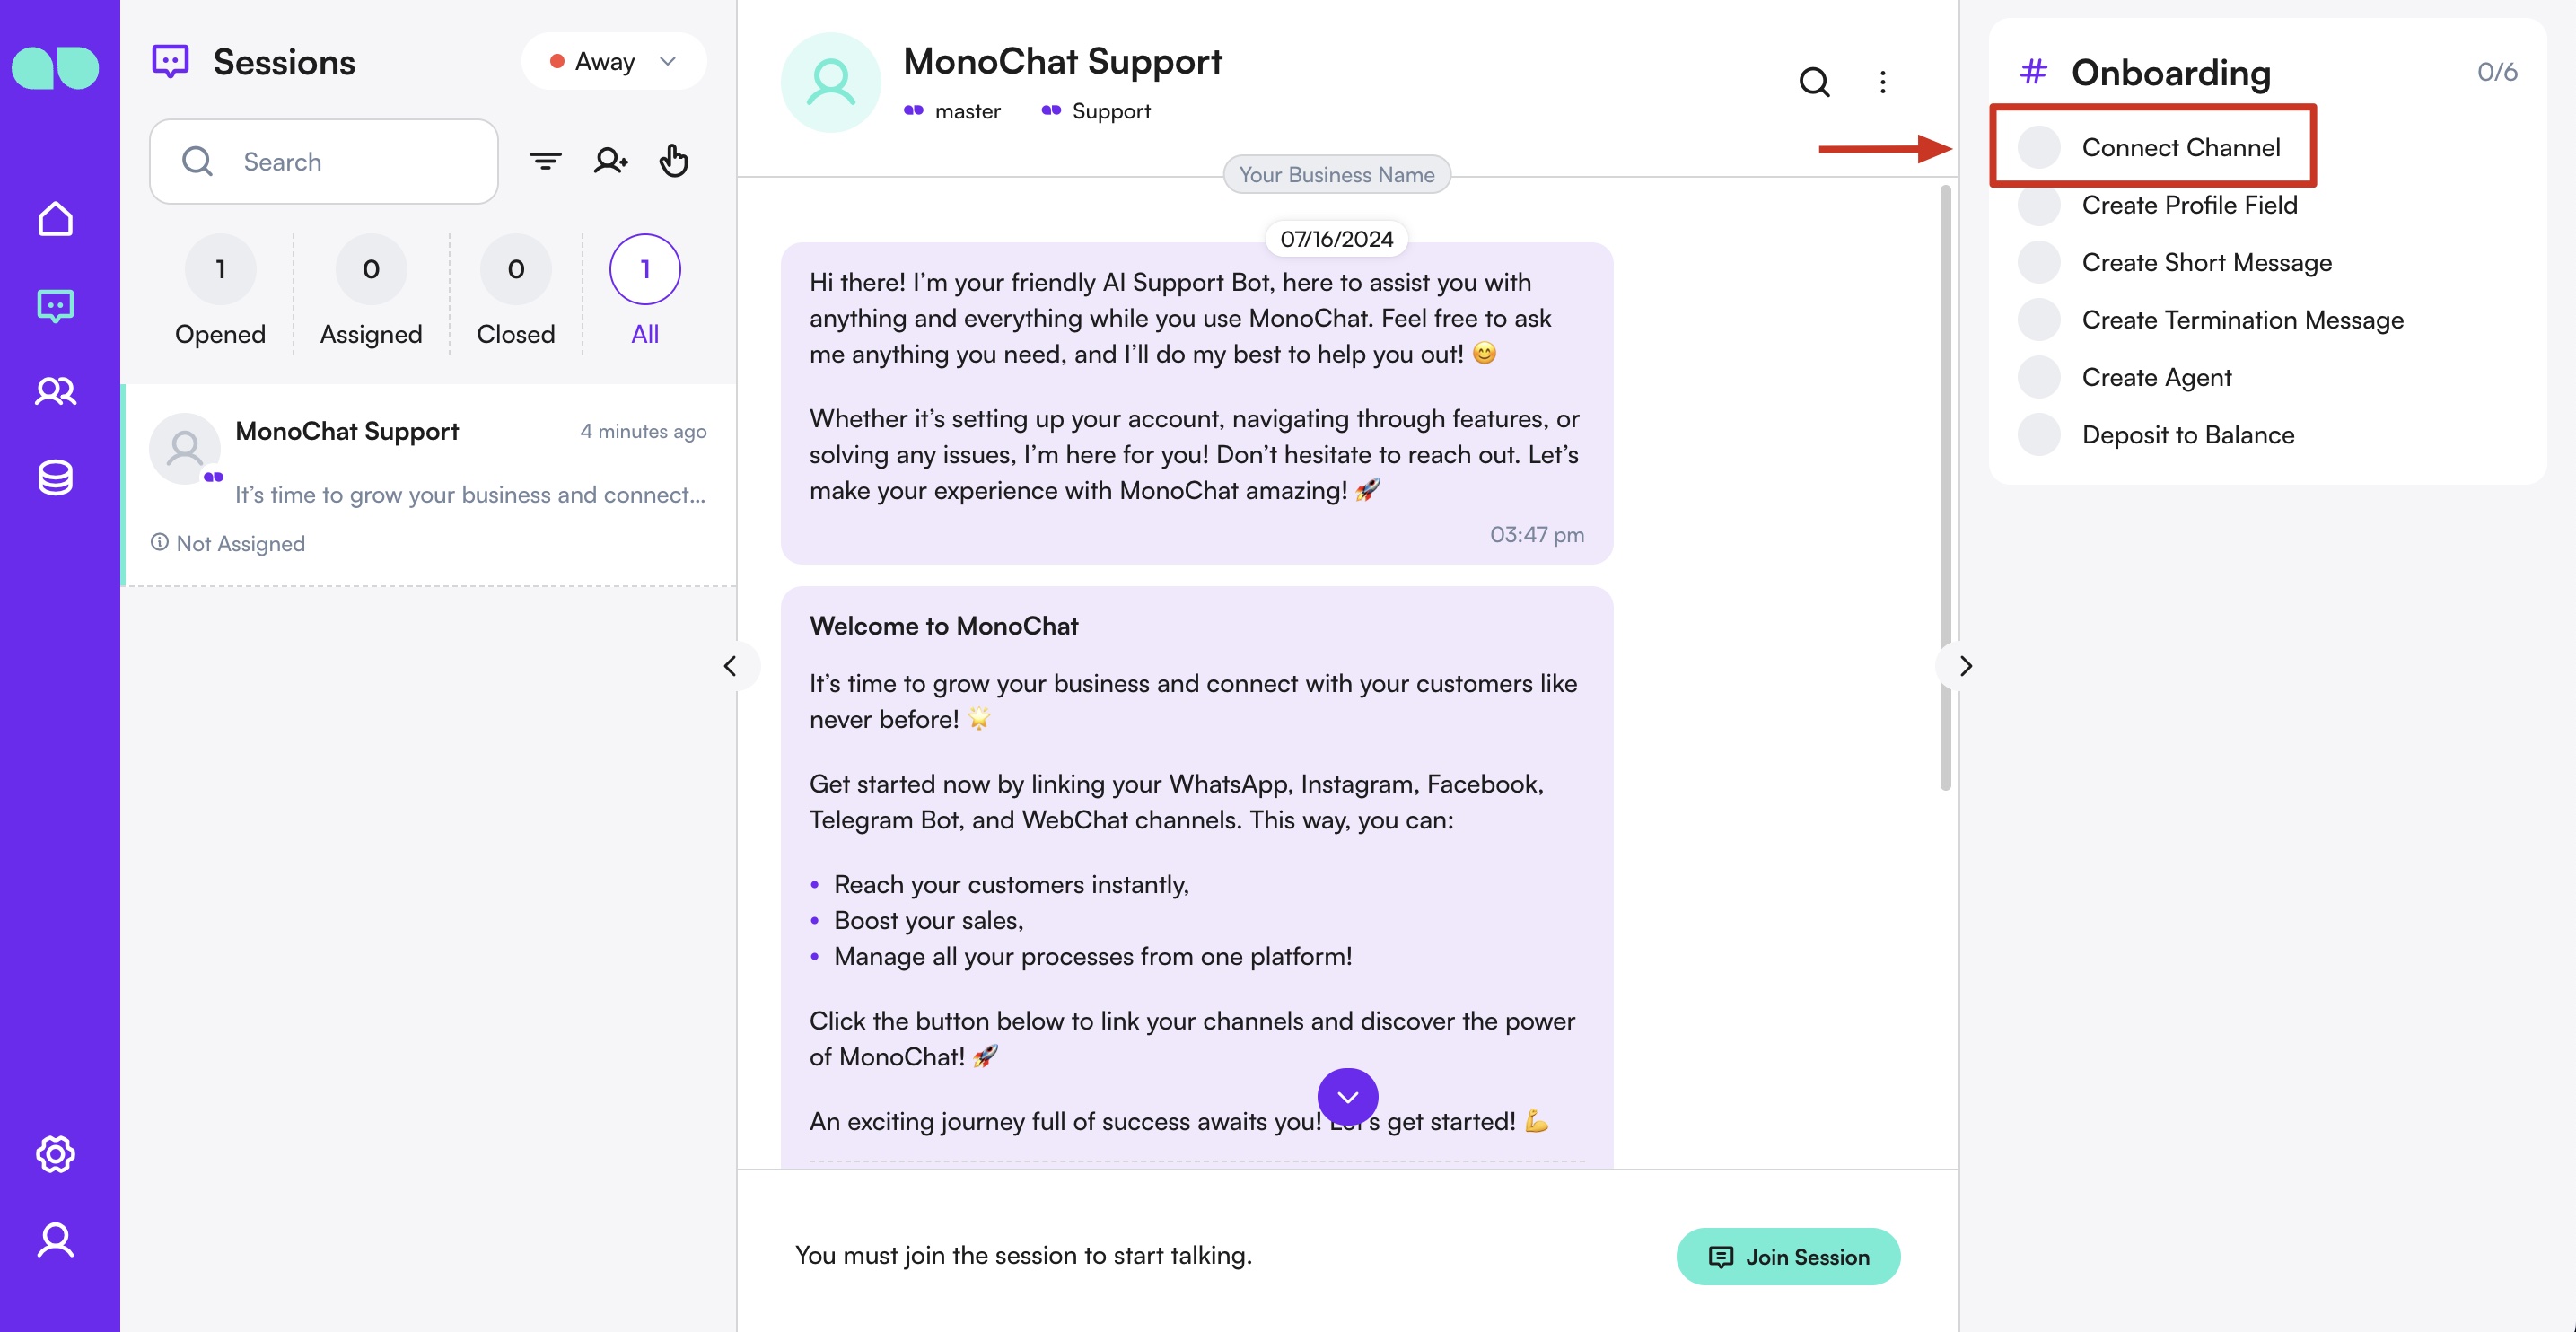
Step 8: Select Your Channel
Pick the channel you want to connect. Each channel has a dedicated guide in the Channels Guide.
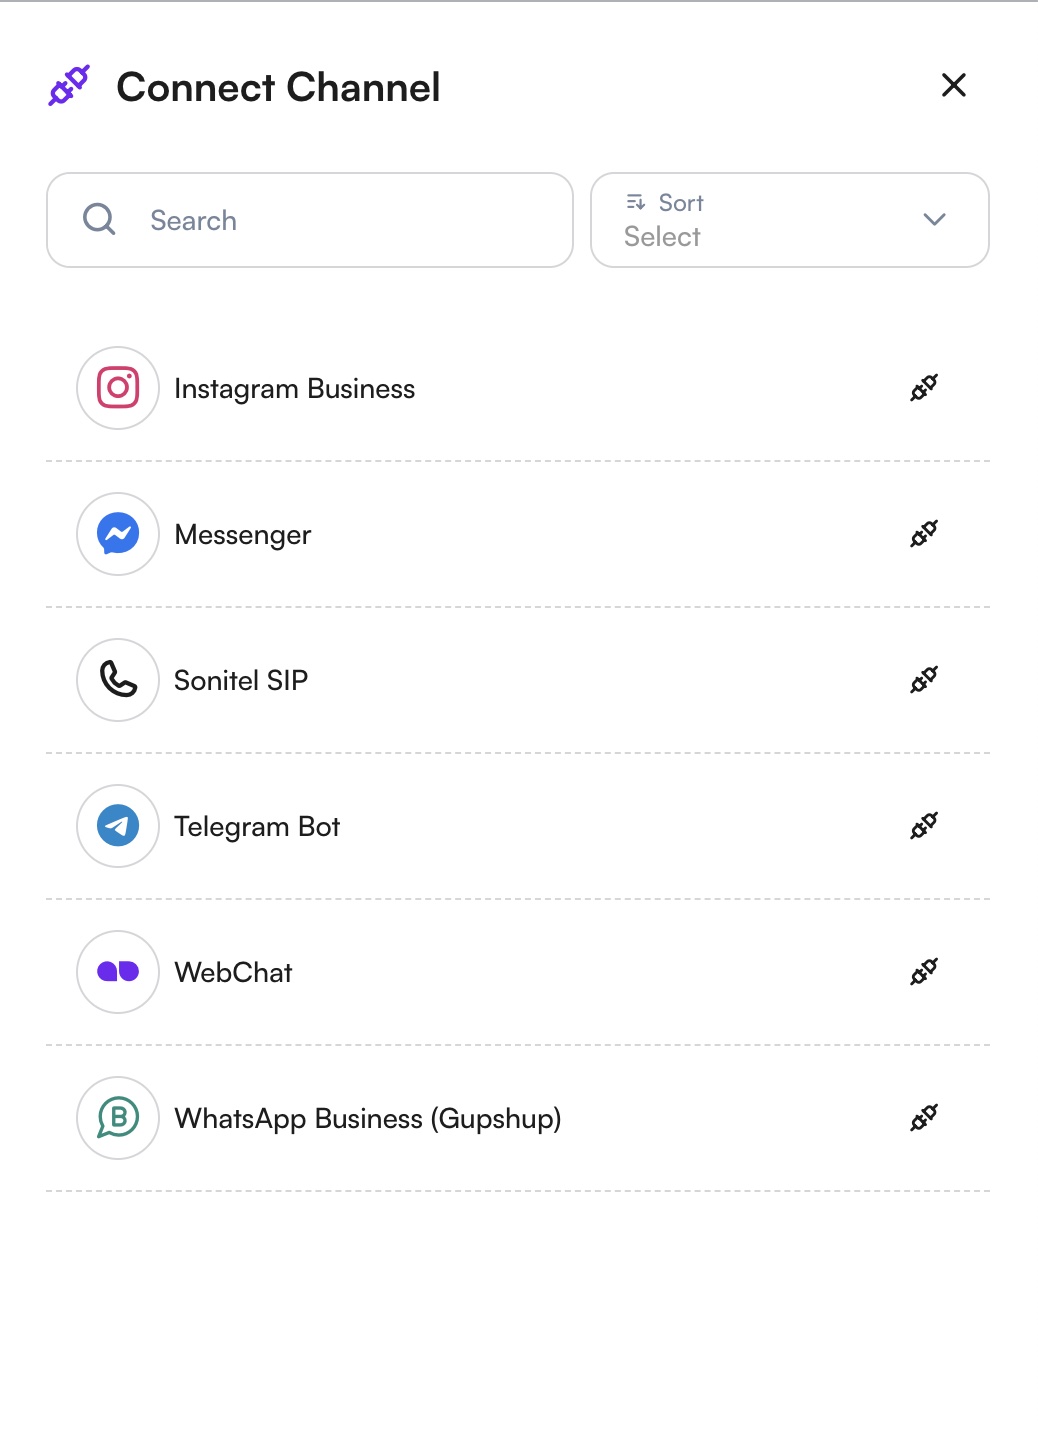
Alternatively, go to Settings > Chat > Channels and click Connect.
Congaturations! You have connected your channel successfully.
First Automation / First Flow
Step 9: Navigate to Flows and Start Creating
- Go to Settings > Automation > Flows from the left menu.
- Click the
Create Flowbutton to start building a new automation.
Step 10: Add the Event Trigger
- From the node list below, click the Event node.
- Choose New Session Created as the event.
This ensures that whenever a new session is opened, the bot is triggered automatically.
Step 11: Add a Welcome Message Action
- Select Action > Send Message.
- Open the Message Builder by selecting your connected channel.
- Compose the message using available options (text,image,list,buttons etc.)
This will be the first interaction with the customer to welcome them.
Step 12: Assign Session to a User
- Select Action > Assign Session.
- Choose one of your team members to handle the session after the bot’s initial message.
Step 13: Connect Nodes
- Drag the output of each node to the input of the next node:
- New Session Created → Send Message → Assign Session
- Make sure all nodes are correctly linked to form a complete flow.
Step 14: Save and Activate the Flow
- Click Save to store your flow.
- Your automation is now active and will trigger for every new session, sending the welcome message and routing to the appropriate team member.
Testing Your First Message
Step 15: Send a Test Message
- Send a message to your connected channel.
- Your message will appear in the Chat Inbox.
- Observe if your flow responds as expected.
By completing these steps, you now have a fully operational workspace, connected channels, and your first automated flow running on MonoChat!
Need Help?
If you encounter any issues while following these steps, you can contact our Support Channel directly from your Inbox in MonoChat.
Alternatively, you can reach us via WhatsApp: Contact Support